Scanning
1 Enable events and ticket types
Attention: A connection to the Internet is required for this step.
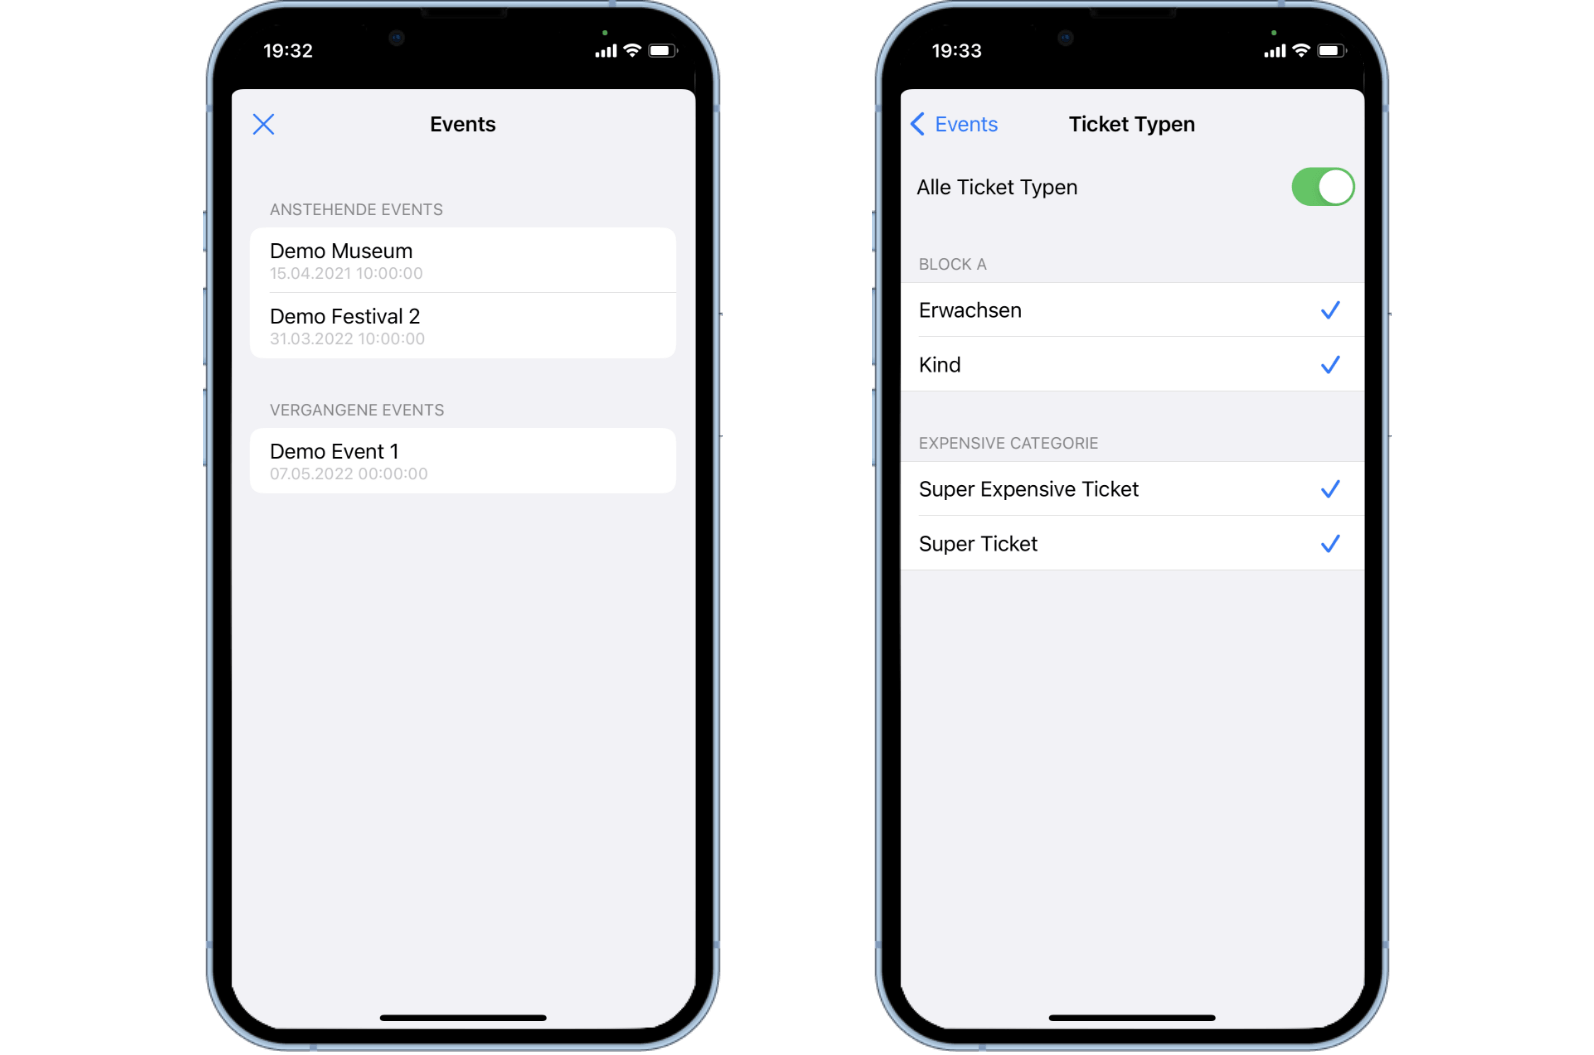
To be able to check in or check out tickets, the events and ticket types must be selected beforehand. Only tickets that match this selection can be checked in validly. If tickets are scanned that do not match this selection, these tickets will appear as invalid. Note that the setting only applies to the respective device.
Pro Tip: Limit the access to certain areas. For example, only VIP tickets can be activated for certain devices in order to place them in the VIP area.
Proceed as follows to activate the events and ticket types:
Open the Access Control app and log in.
On the scan screen, select the settings wheel in the upper right corner.
Click on the event you want to share with the access control.
Select individual ticket types by clicking on them or activate the checkbox All ticket types to use all ticket types of the event. All active ticket types will be marked with a blue checkmark.
Click Events in the upper left corner to save your selection. A blue check mark will appear next to the event.
You can repeat the process for as many events and ticket types as you like. For example, you can permanently activate season ticket events.
Click the blue X in the upper left corner to complete the process. After that, the download of the tickets will start automatically.
Season Events
Season ticket events are not available for selection and therefore do not need to be activated. The reason for this is that all tickets for a season ticket event are automatically activated through the selection of a connected single event. The prerequisite for this is the linking of the single event with the season event via the event settings in the dashboard and the associated events tab.
This functionality ensures that a season ticket can be scanned as green for each single event once. All further events on the same match day will then appear yellow, signaling that the ticket is already on site.
2 Ticket Download
Attention: A connection to the Internet is required for this step.
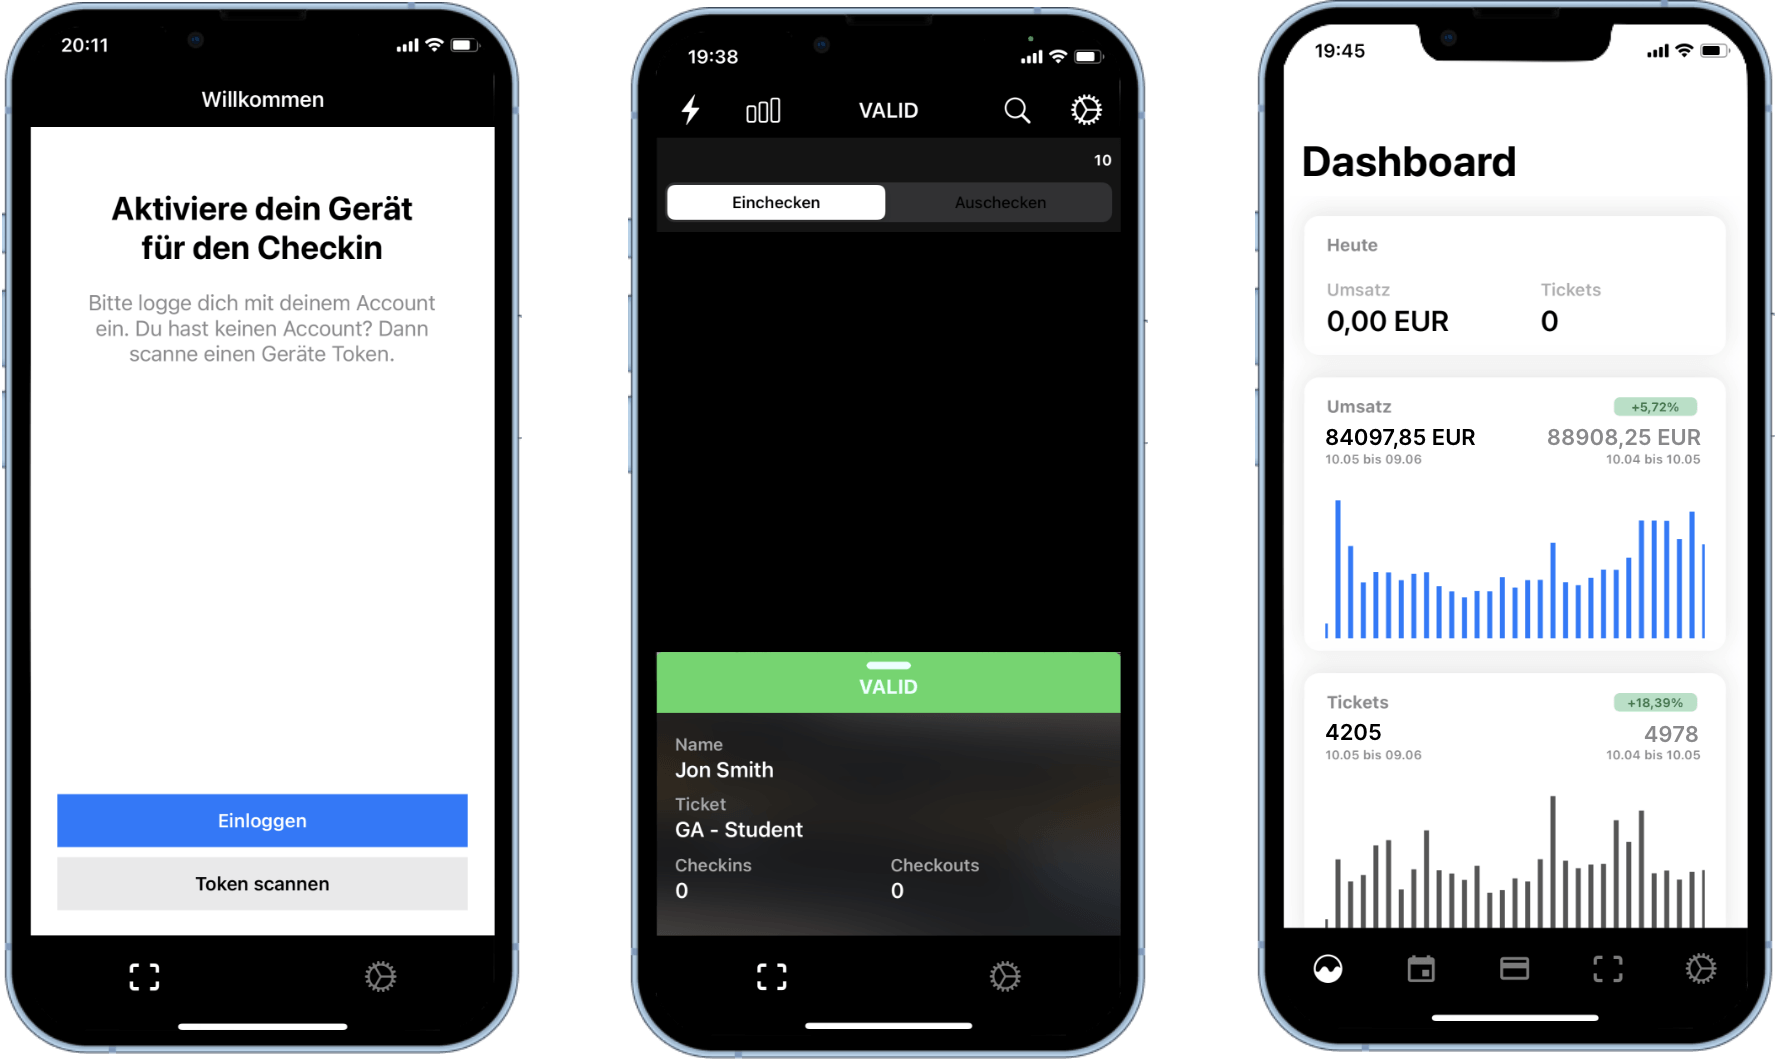
After selecting the events and ticket types, the device downloads the barcodes of all tickets that match the selection. Only tickets that have been downloaded can be scanned. Otherwise, the barcode would appear as invalid.
The download of the tickets works automatically and cannot be triggered manually. The download of the tickets is executed again at regular intervals. This will download subsequently purchased tickets or invalidate canceled tickets. The frequency of this download can be changed in the settings.
Check Ticket Download
Follow the steps below to check if the download was successful:
Open the Access Control app and log in.
Go to the scan screen.
In the header bar, below the menu items, you will find a bar that shows you the downloaded tickets. This number corresponds to all barcodes downloaded for this device.
The display "Tickets are being downloaded" symbolizes that the download is still active and therefore not yet completed.
Note: The number of downloaded tickets does not necessarily have to correspond to the same number of valid tickets. Due to subsequent cancellations or deactivated ticket types, this number can also be higher.
3 Tickets check in
Attention: No connection to the Internet is necessary for this step.
Once you have selected the desired events and ticket types and the download was successful, you can start scanning.
Proceed as follows to check in a ticket:
Open the Access Control app and log in.
Go to the scan screen and select Check In from the header.
Hold the device in front of the barcode or QR code.
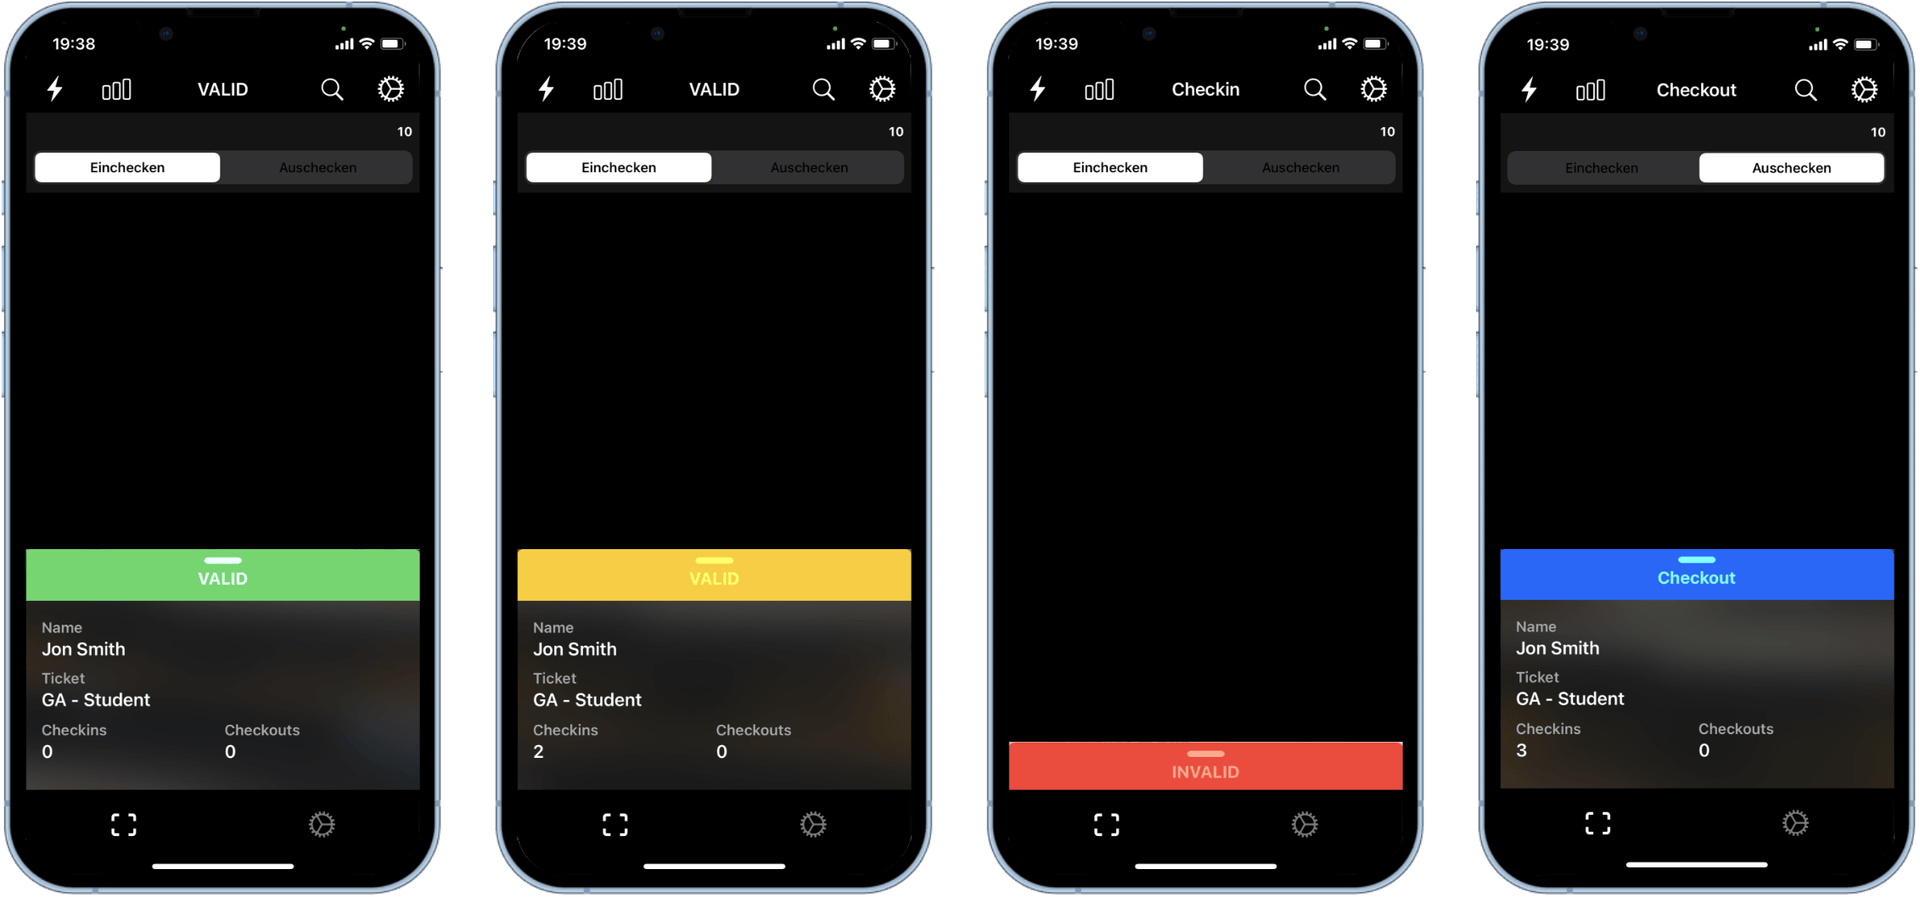
If the scan is successful, an advisory tone and a colored marker appear. If the ticket is valid, the ticket details will also be displayed.
Pro Tip: To scan faster, tap the screen to focus on the ticket. Click the flash icon in the top left corner to turn on the device's LED light if the image appears too dark. Note that no screenshots of the ticket will be recognized by the camera.
Scan colors
Expand all4 Check in tickets manually
Attention: No connection to the Internet is necessary for this step.
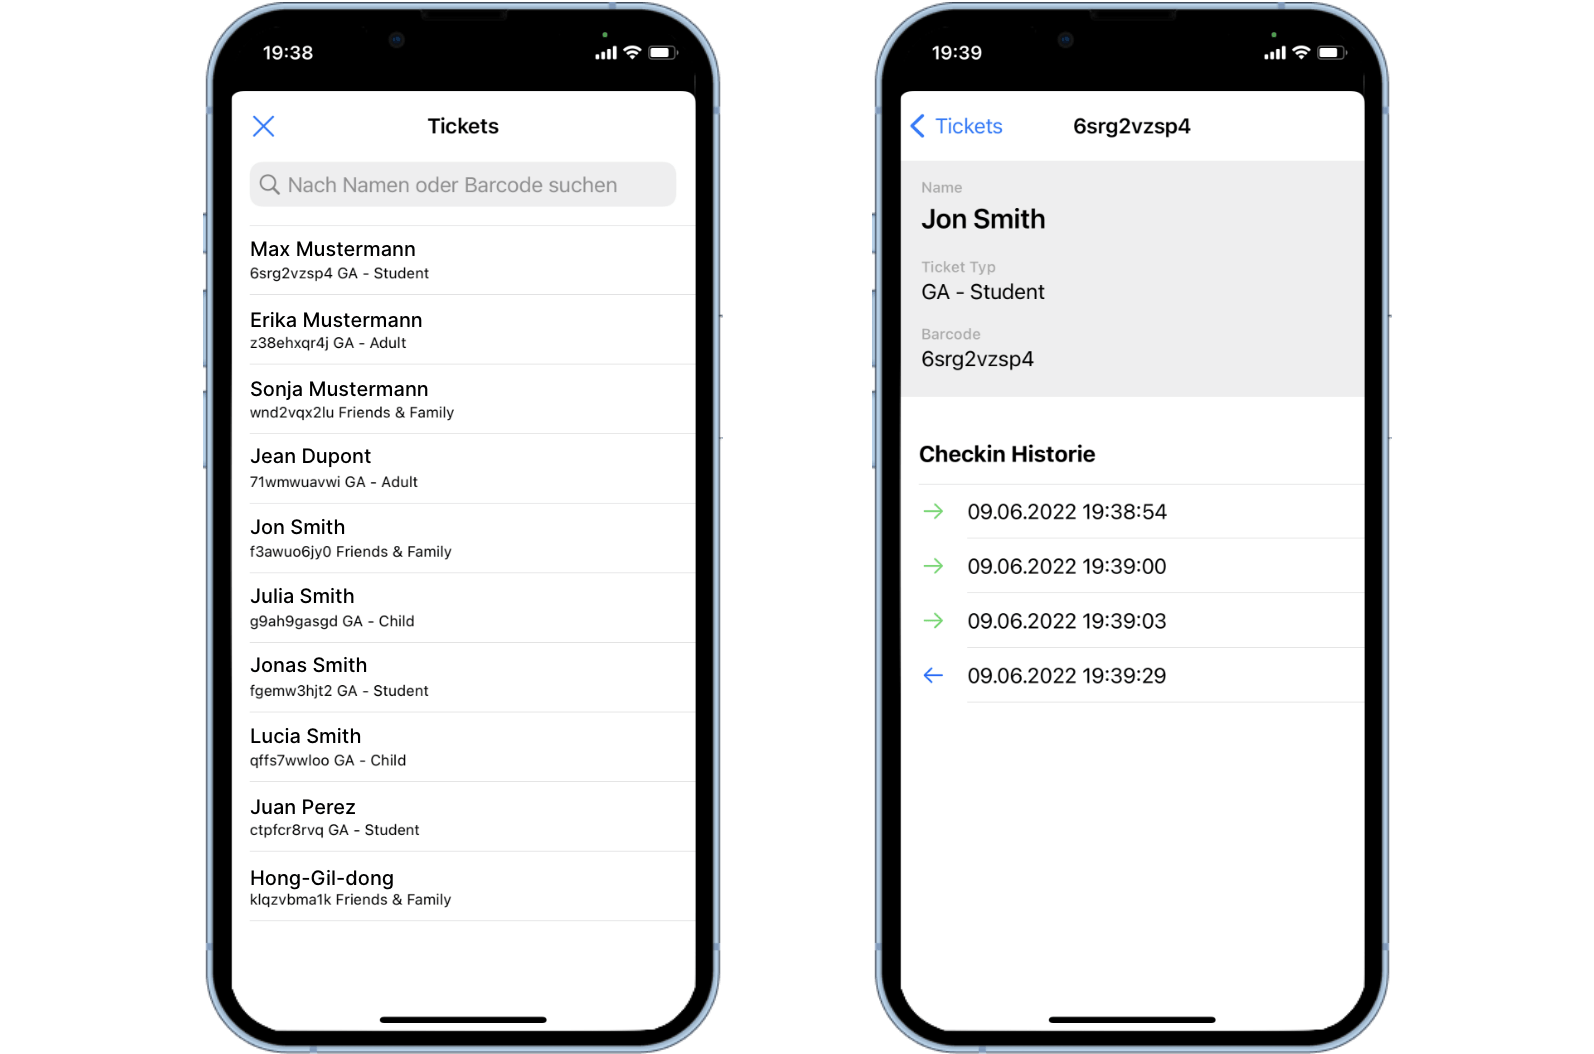
You have the option to manually search for a visitor to check them in and out or view individual scan histories. Use the manual check-in if, for example, no ticket barcode is available or the scanning of the ticket does not work.
How does the manual checkin work?
Open the Access Control app and log in.
Go to the scan screen and select the magnifying glass in the upper right corner.
Search for the desired ticket via the list or by entering the name or barcode. All tickets that were previously selected via the event selection will be displayed.
Swipe your finger to the left to check it in. When the ticket is successfully checked in, a blue check mark is displayed.
Swipe your finger to the right to check it out. When the ticket has been checked out successfully, the blue check mark will disappear.
Note: The manual checkin only works for downloaded tickets. So if you can't find the ticket using the search function, the ticket will not have been downloaded.
5 Check out tickets

Attention: No connection to the Internet is necessary for this step.
Checking out tickets works similarly to checking in. Proceed as follows to check out a ticket:
Open the Access Control app and log in.
Go to the scan screen and select Check Out from the header.
Hold the device in front of the barcode or QR code.
If the scan is successful, an advisory tone and a colored marker appear. If the ticket is valid, the ticket details will also be displayed.
Scan colors
Expand allTip: To scan faster, tap the screen to focus on the ticket. Click the flash icon in the top left corner to turn on the device's LED light if the image appears too dark. Note that no screenshots of the ticket will be recognized by the camera.
6 Check in tickets multiple times
Attention: No connection to the Internet is necessary for this step.
As soon as a ticket has been successfully checked in for the first time (green), every further successful check-in will appear in yellow. This color indicates that the ticket has already been checked in and is probably already on the event site.
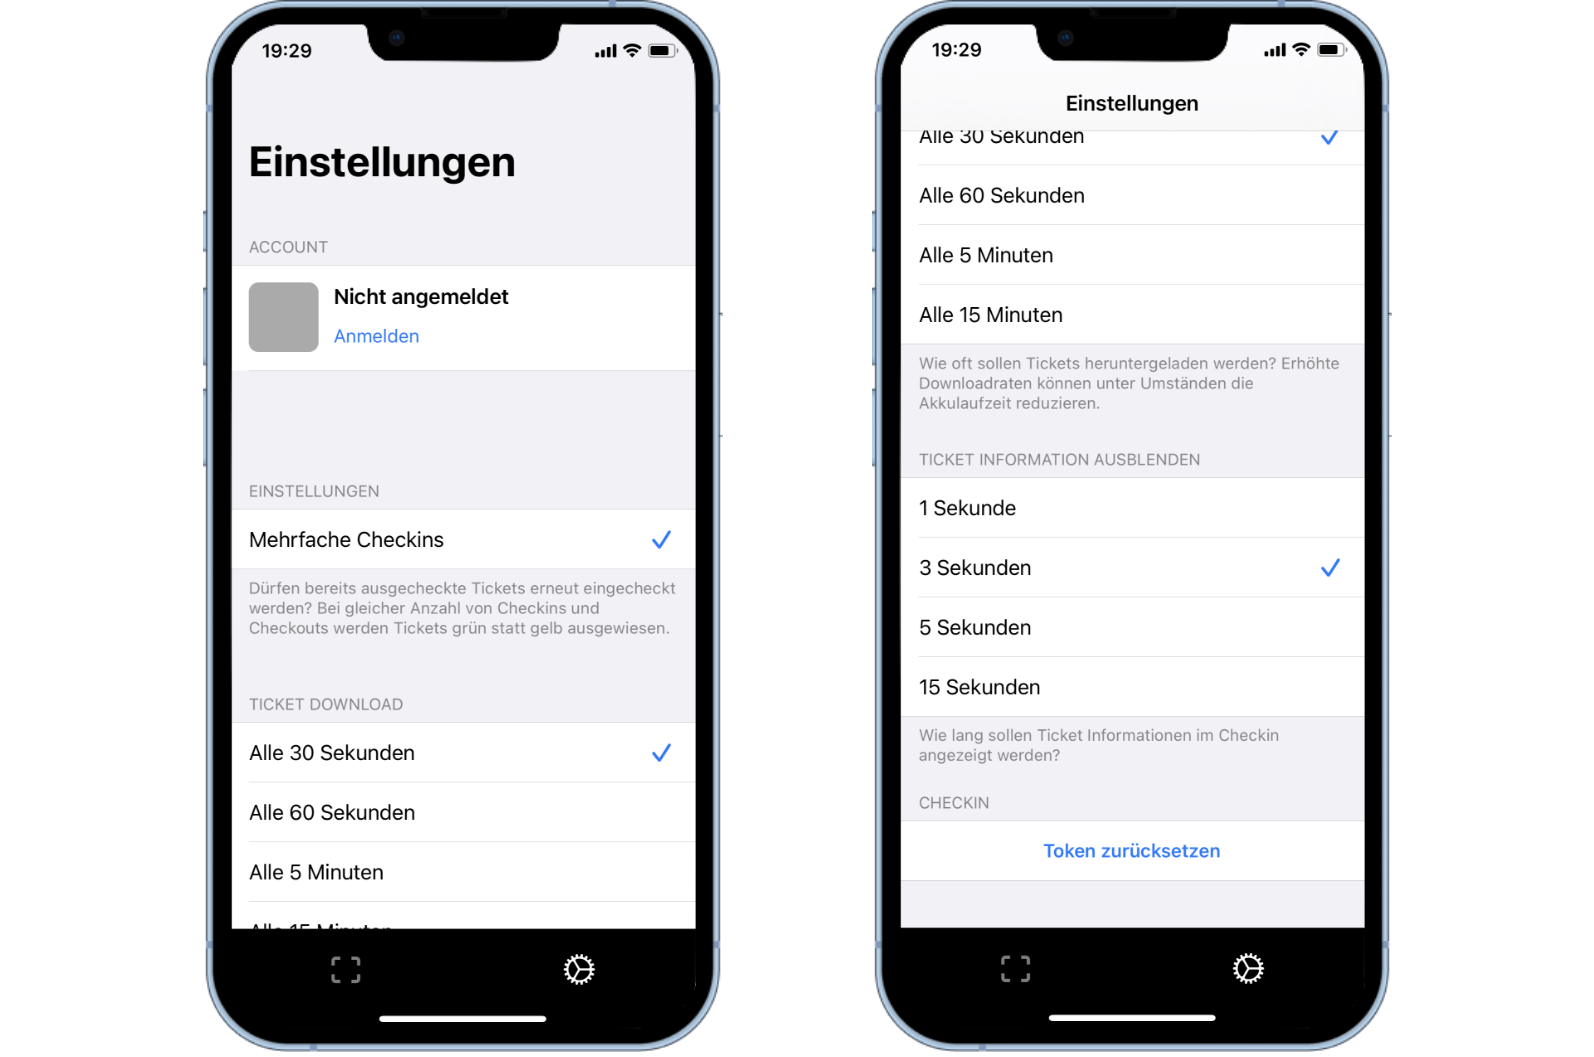
In order to be able to check in a ticket green multiple times, there is the possibility of multiple check-in.
How does the multiple checkin work?
Using the Multiple Checkin function, the device compares the number of checkins with the number of checkouts during scanning. If the number of checkouts is greater than or equal to the number of checkins, the ticket can be scanned in green again.
Activate multiple checkin
Follow the steps below to activate the multiple checkin:
Open the Access Control app and log in.
Go to the settings via the settings wheel at the bottom right.
Activate the Multiple Checkins setting. When activated, a blue check mark appears.
7 Synchronize check-in numbers
Attention: A connection to the Internet is required for this step.
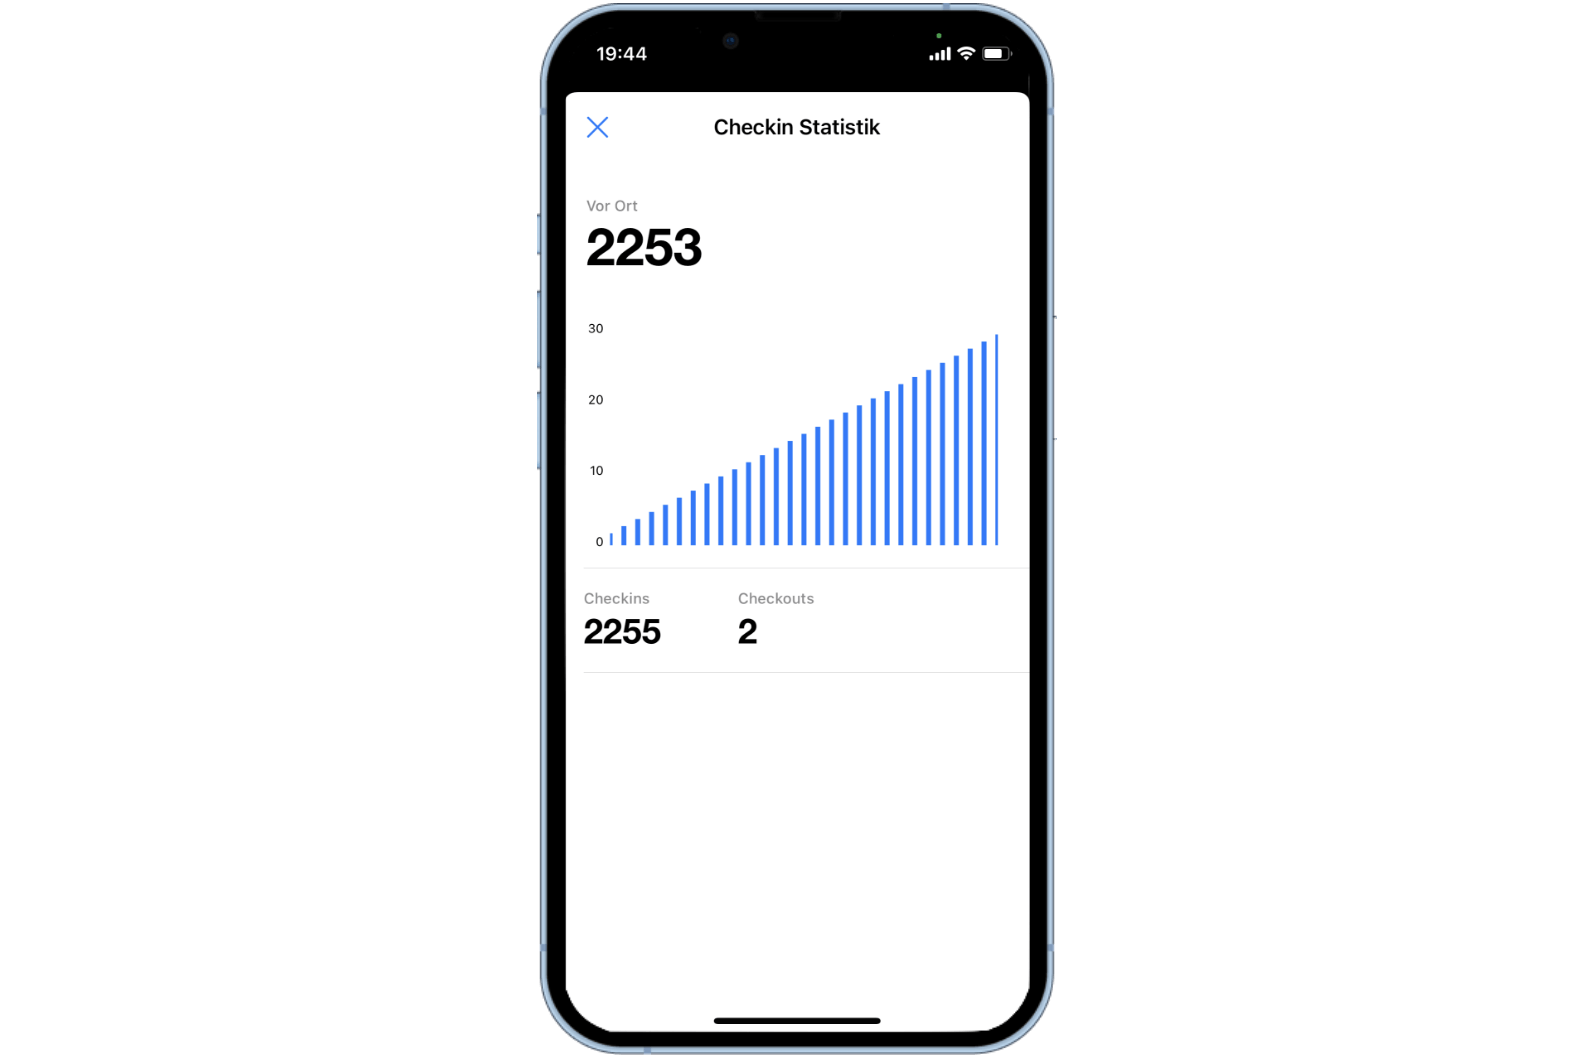
All checkin and checkout numbers or statistics are stored on the respective devices. This means that no direct connection to the Internet is necessary as long as the data on the device is sufficient. However, as soon as the data is transferred to other devices or to the dashboard, an internet connection is required.
Live data during scanning
In order to get live data and statistics about the checkin from any device at any time, you must first and foremost ensure a secure internet connection with each device. The synchronization of the numbers takes place at regular intervals, in short intervals. Thus, you can view the live data via the dashboard as well as via the scan statistics in the app.
Was this page helpful?
For the sake of better readability, the simultaneous use of the language forms male, female and diverse (m/f/d) is waived. All personal designations apply equally to all genders.